Adding Locations to OS X World Clock Widget
I love Baltimore. I wake up each and every morning happy to live here. Every day I'm amazed by all the creativity and weird that thrives in this place. Even though Baltimore occasionally disappoints me, I still feel slighted whenever we're overlooked in a list of American cities. Hello! It's Baltimore!
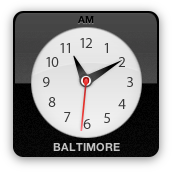
Since the introduction of Dashboard in 10.4, I've been annoyed that I couldn't pick my hometown as the location for the World Clock included with OS X. With my new MacBook Pro, I took it into my own hands to fix this obvious oversight on Apple's part.
If you're inclined to do the same, follow these steps:
Open a Finder window and navigate to /Library/Widgets/
Select "World Clock" and right-click (or "secondary-click" if you're an anal bastard)
In the pop-up menu, select "Show Package Contents"
Find "WorldClock.js" and open it in your favorite text editor. You'll see a big list of cities, with additional info; each city on a new line.
To create the line you'll use for your city, you'll have to do a little research. We can see the format of the lines is:
{city:'CityName', offset:###, timezone:'Timezone', id:"SomeNumber"},The offset is the distance from GMT in minutes, positive or negative. Everything else is pretty easy to figure out except for the
id:value. Turns out that's the GeoName ID for the location you're adding.Create the line for your city, and paste it in the appropriate place. I stuck this:
{city:'Baltimore', offset:-240, timezone:'US/Eastern', id:"4347778"},right above Boston.