G50 Shift Bushing Refresh
Spent yesterday morning cleaning up the shift assembly in my ‘88 911. The car was optioned with the G50 transaxle’s short-shifter, but a previous owner had put a knob that added a few inches of throw. It looked like at some point some water had been spilled onto the knob and down the lever, because there was some surface rust under the knob which I wanted to clean up. Most notably, though, there was a ton of play in the lever when in neutral and some slop between gears, both of which are indications of worn shift bushings. Replacing the shift bushings isn’t too tough a job - half a day on the long side, and I thought I’d tackle the rust cleanup and shift knob replacement at the same time.

Using Brad Phillips’ G50 refresh article for Hagerty as a reference, I pulled the console, shift lever, and shift housing out of the car. Removed the surface rust on the lever with a smoothing stone on my Dremel, sandpaper, and a wire brush. Then I taped off the lever and repainted. I vacuumed the old bushing dust out the cavity in the floor revealing a little more surface rust on the floor of the car. I wire-brushed that, then used a sanding block and vacuumed until bare metal was exposed, then I used a tacky cloth to remove any remaining dust and painted the exposed surfaces.
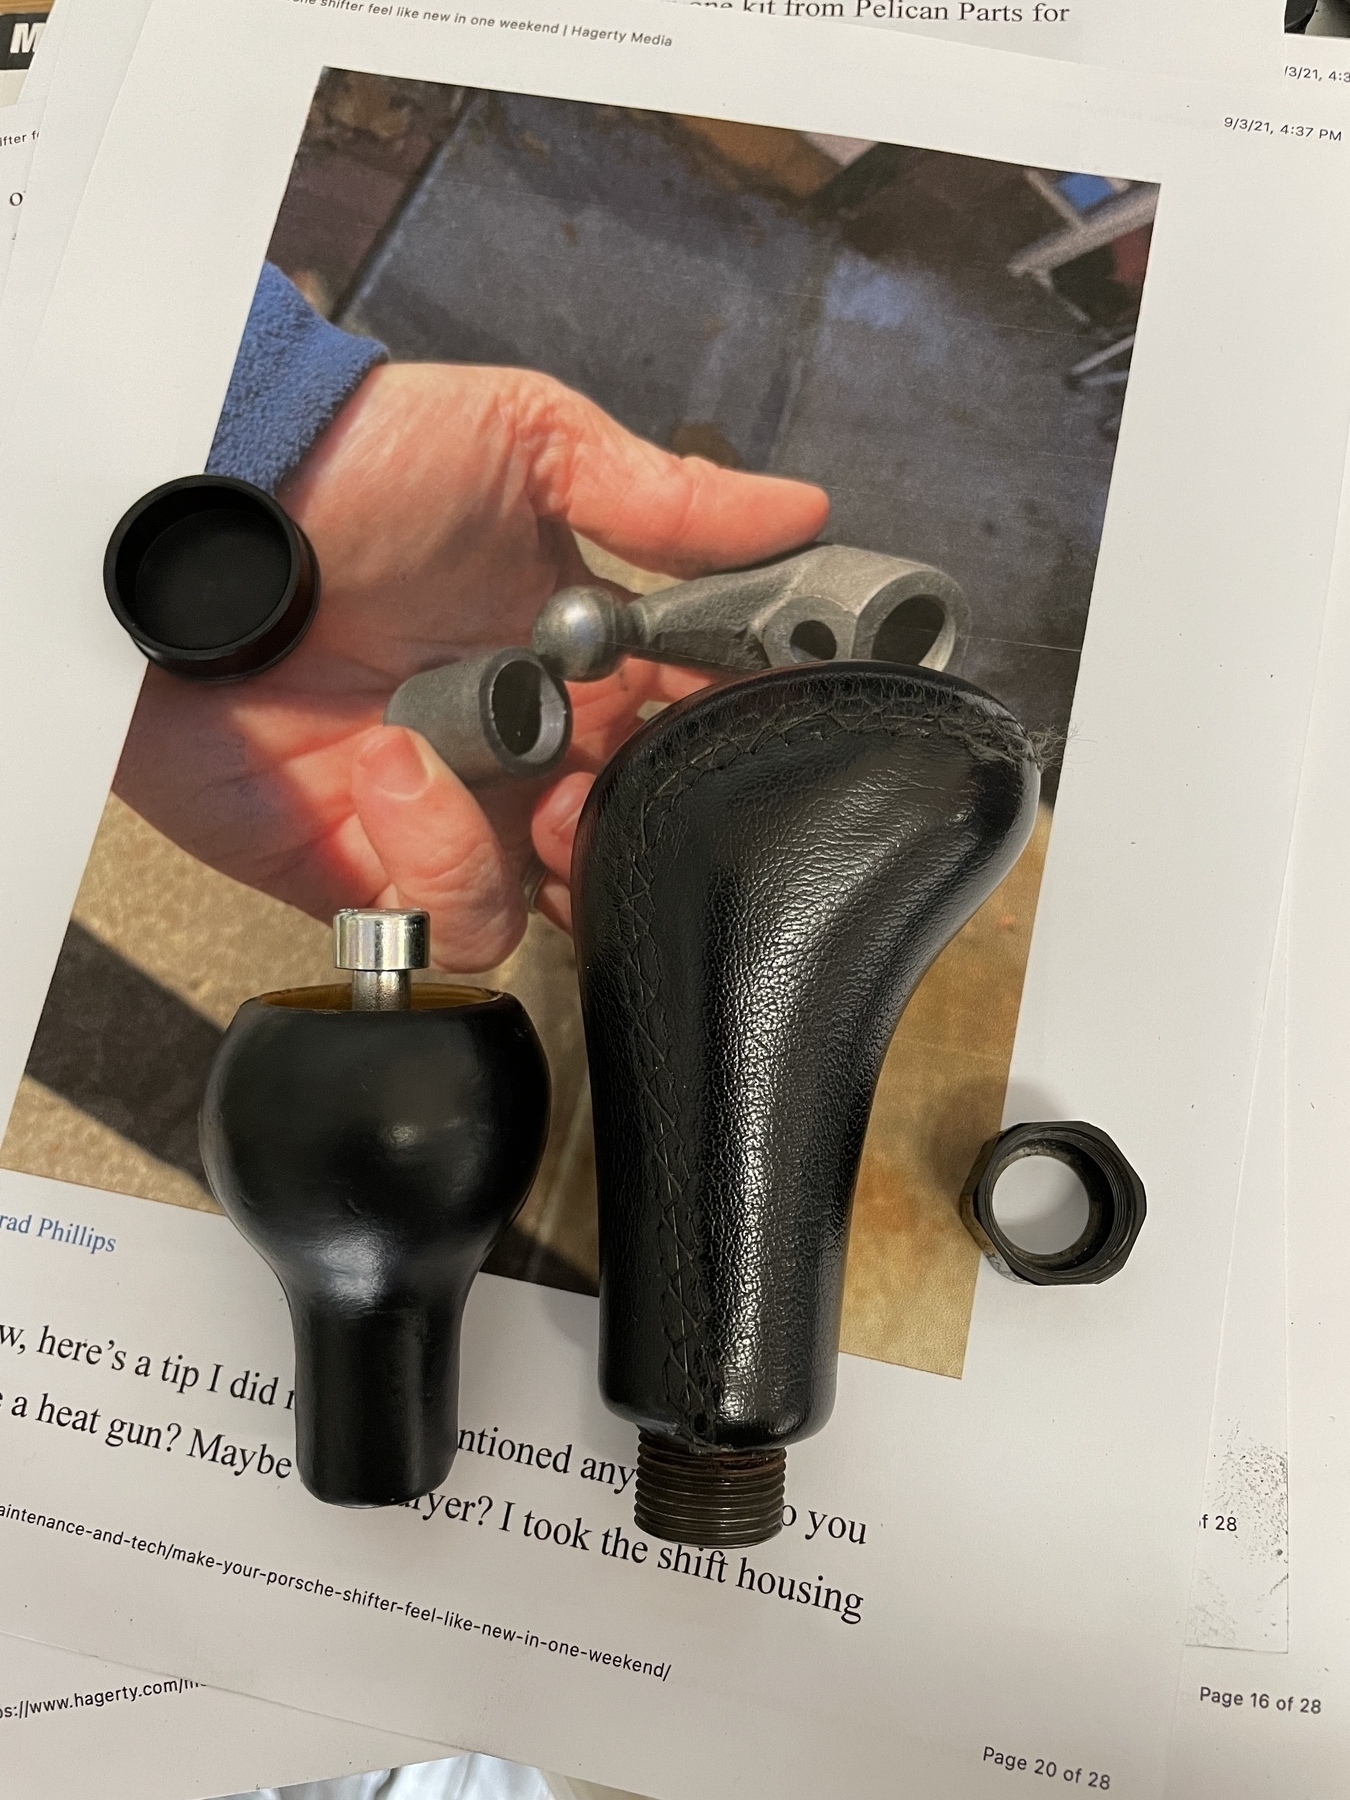
Reassembly was a bit of a challenge since the new bushing is much less pliable than the quite-worn original. In addition to using a heat gun to warm the bushing and housing, I found a link to some photos of this old article in “Excellence” magazine in which the author gives some tips for replacing failed G50 bushings. Relevant paragraphs excerpted below:
Installing the bushing was simple. First, we clamped the shifter in a vice to hold it steady - applying a thin film of grease ont the bushing, we installed it in the housing. The bushing goes in from the rear of the housing with the large flared end pointing toward the rear of the car. The bushing is a very snug fit, and we worked it into the hole much like mounting a tire on a tim; first, we pushed half of the bushing into the hole and then pushed the remaining half of the bushing Into place with a heavy screwdriver, working in one direction. Once the bushing pops into the housing, it self-centers due to a recess in the bushing.
We wiped a film of white lithium grease inside the bushing and used the shop vacuum to remove the remains of the old bushing from the floor recess. The shifter shaft was also wiped clean and a thin coat of grease was applied to the shalt. Prior to installation, we decided to take the time to remove the shifter pin, clean it, and apply a thin layer of grease. This is a simple matter of removing a lock clip, sliding out the pin, and cleaning and greasing the pin. We also applied a small amount of grease to the pivot-ball portion of the shift lever.
At the end of the day I have a nice, tight shift feel, a shorter throw thanks to the removal of the long shift knob, and cleaned up the shift lever.
Took the car out for a drive with my neighbor and found a picturesque spot by a mill. Couldn’t ask for more.