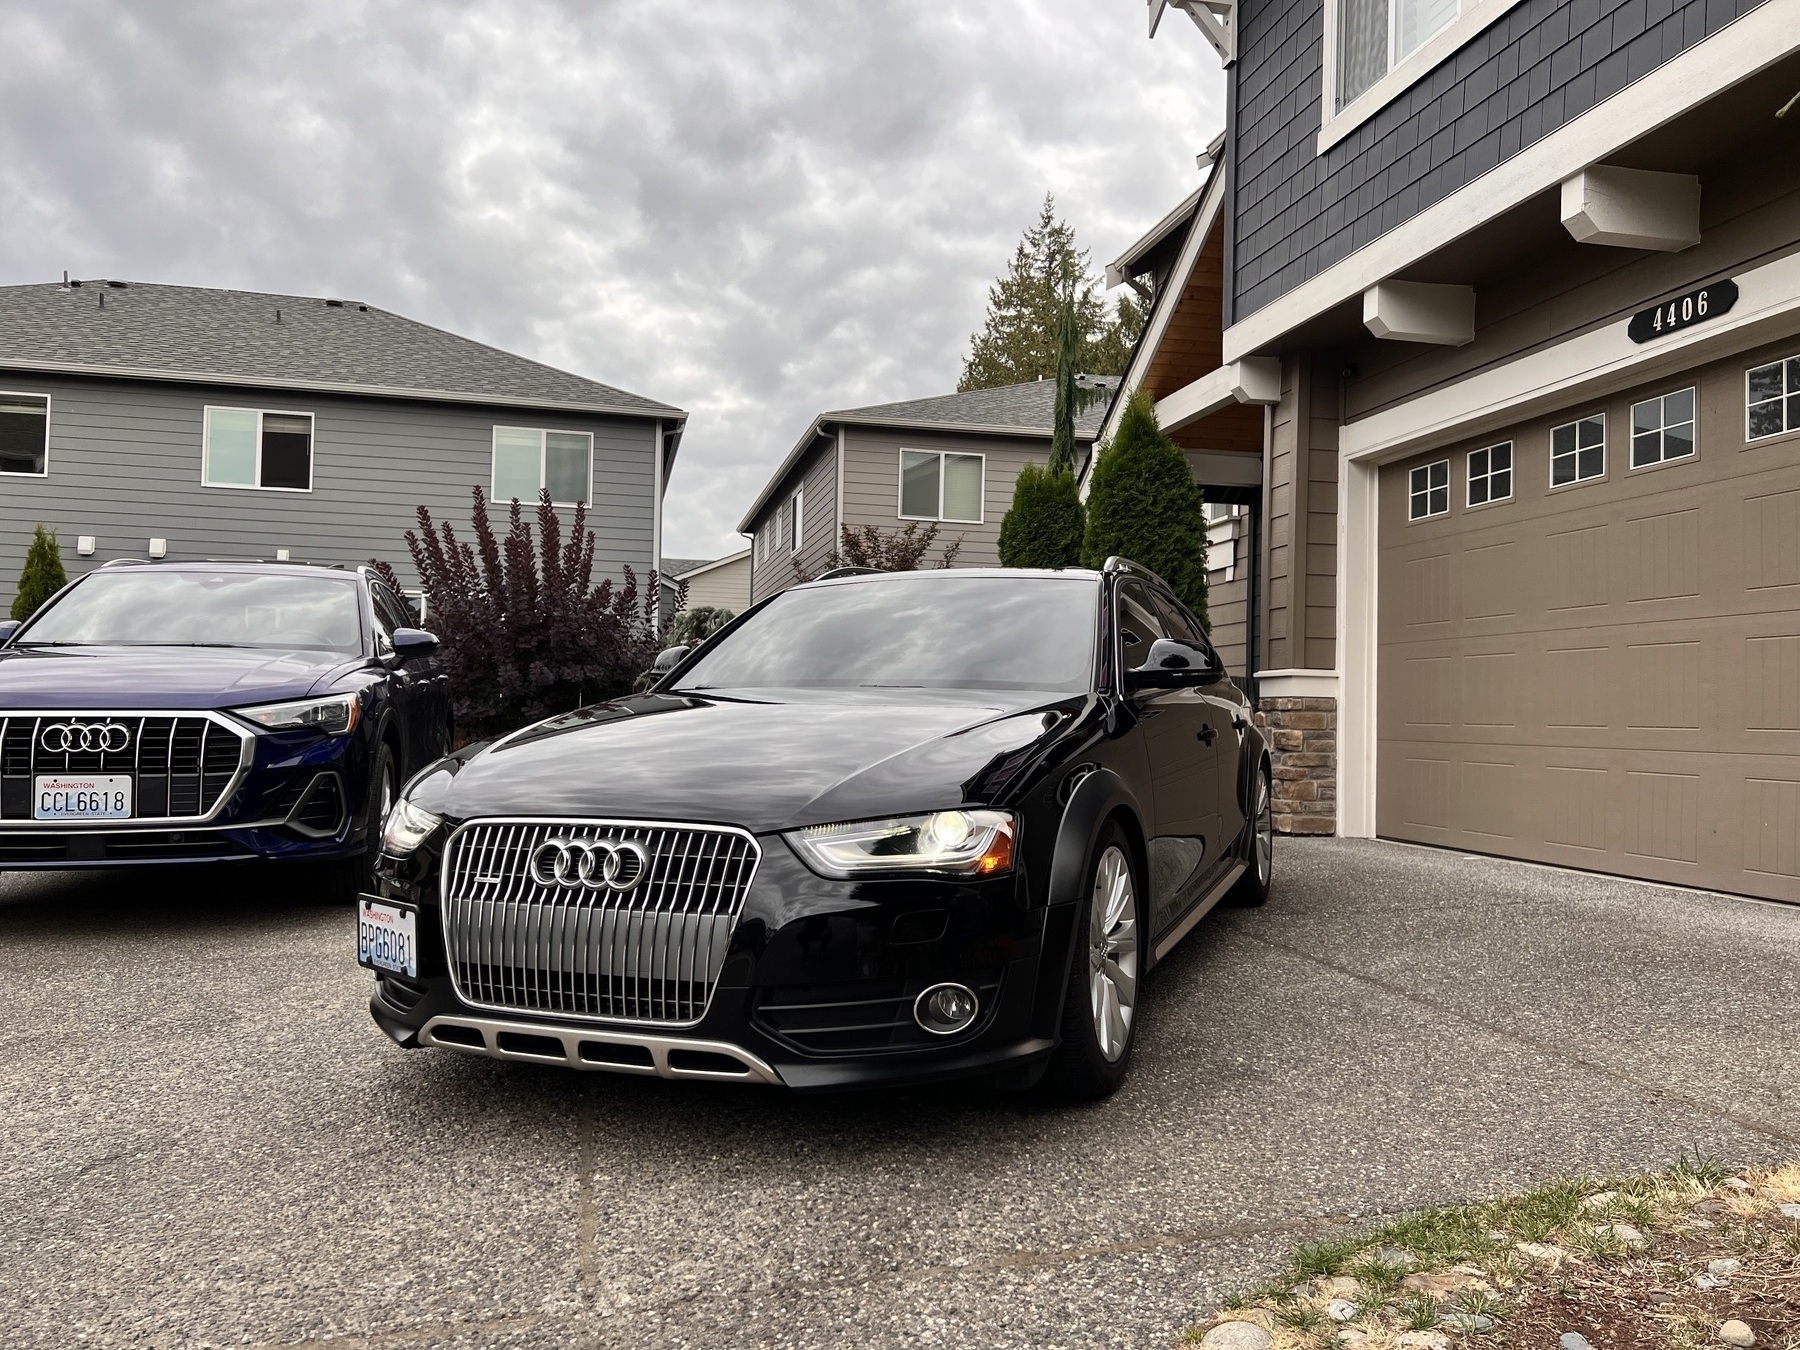
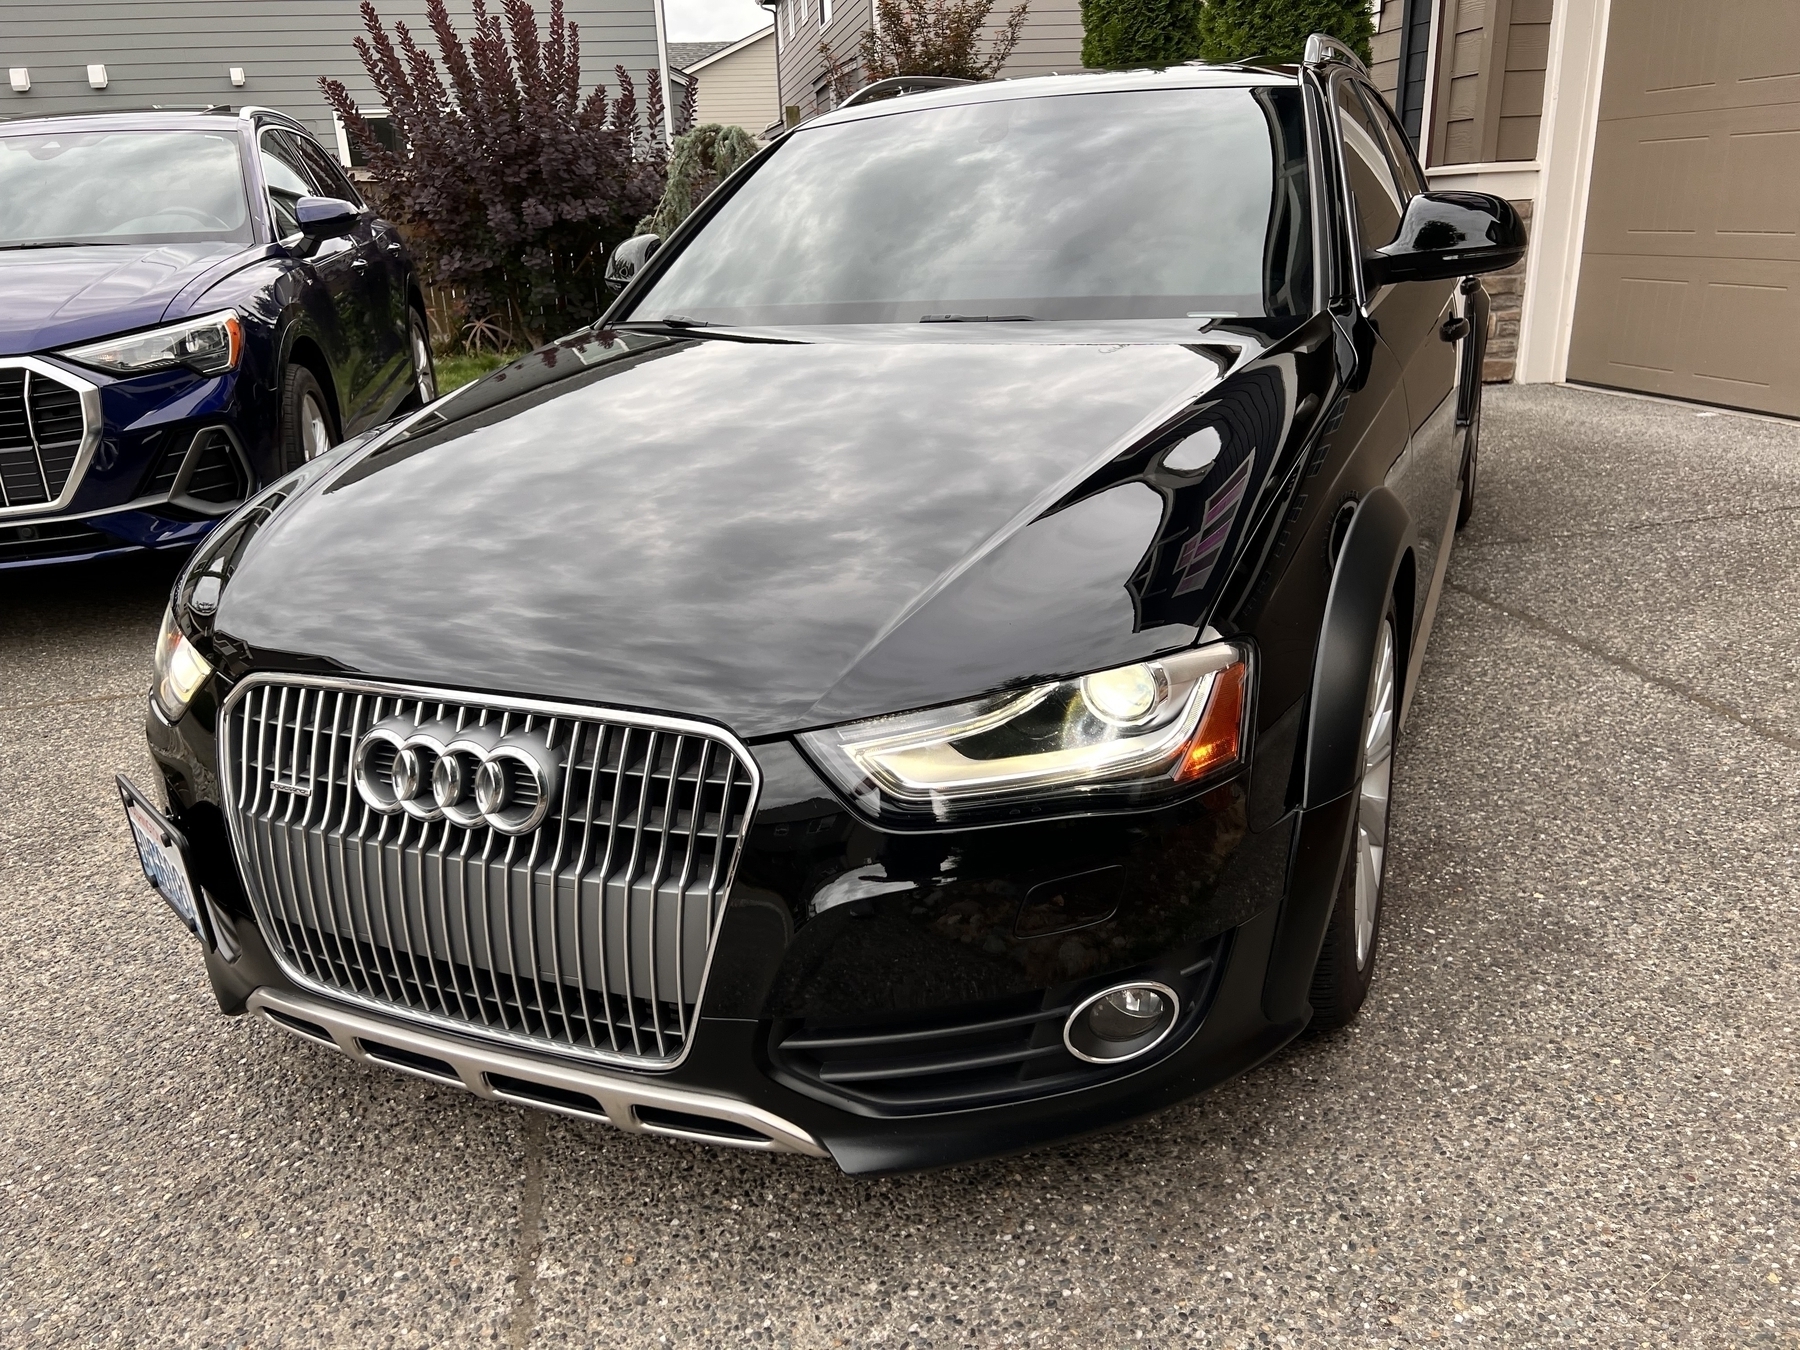
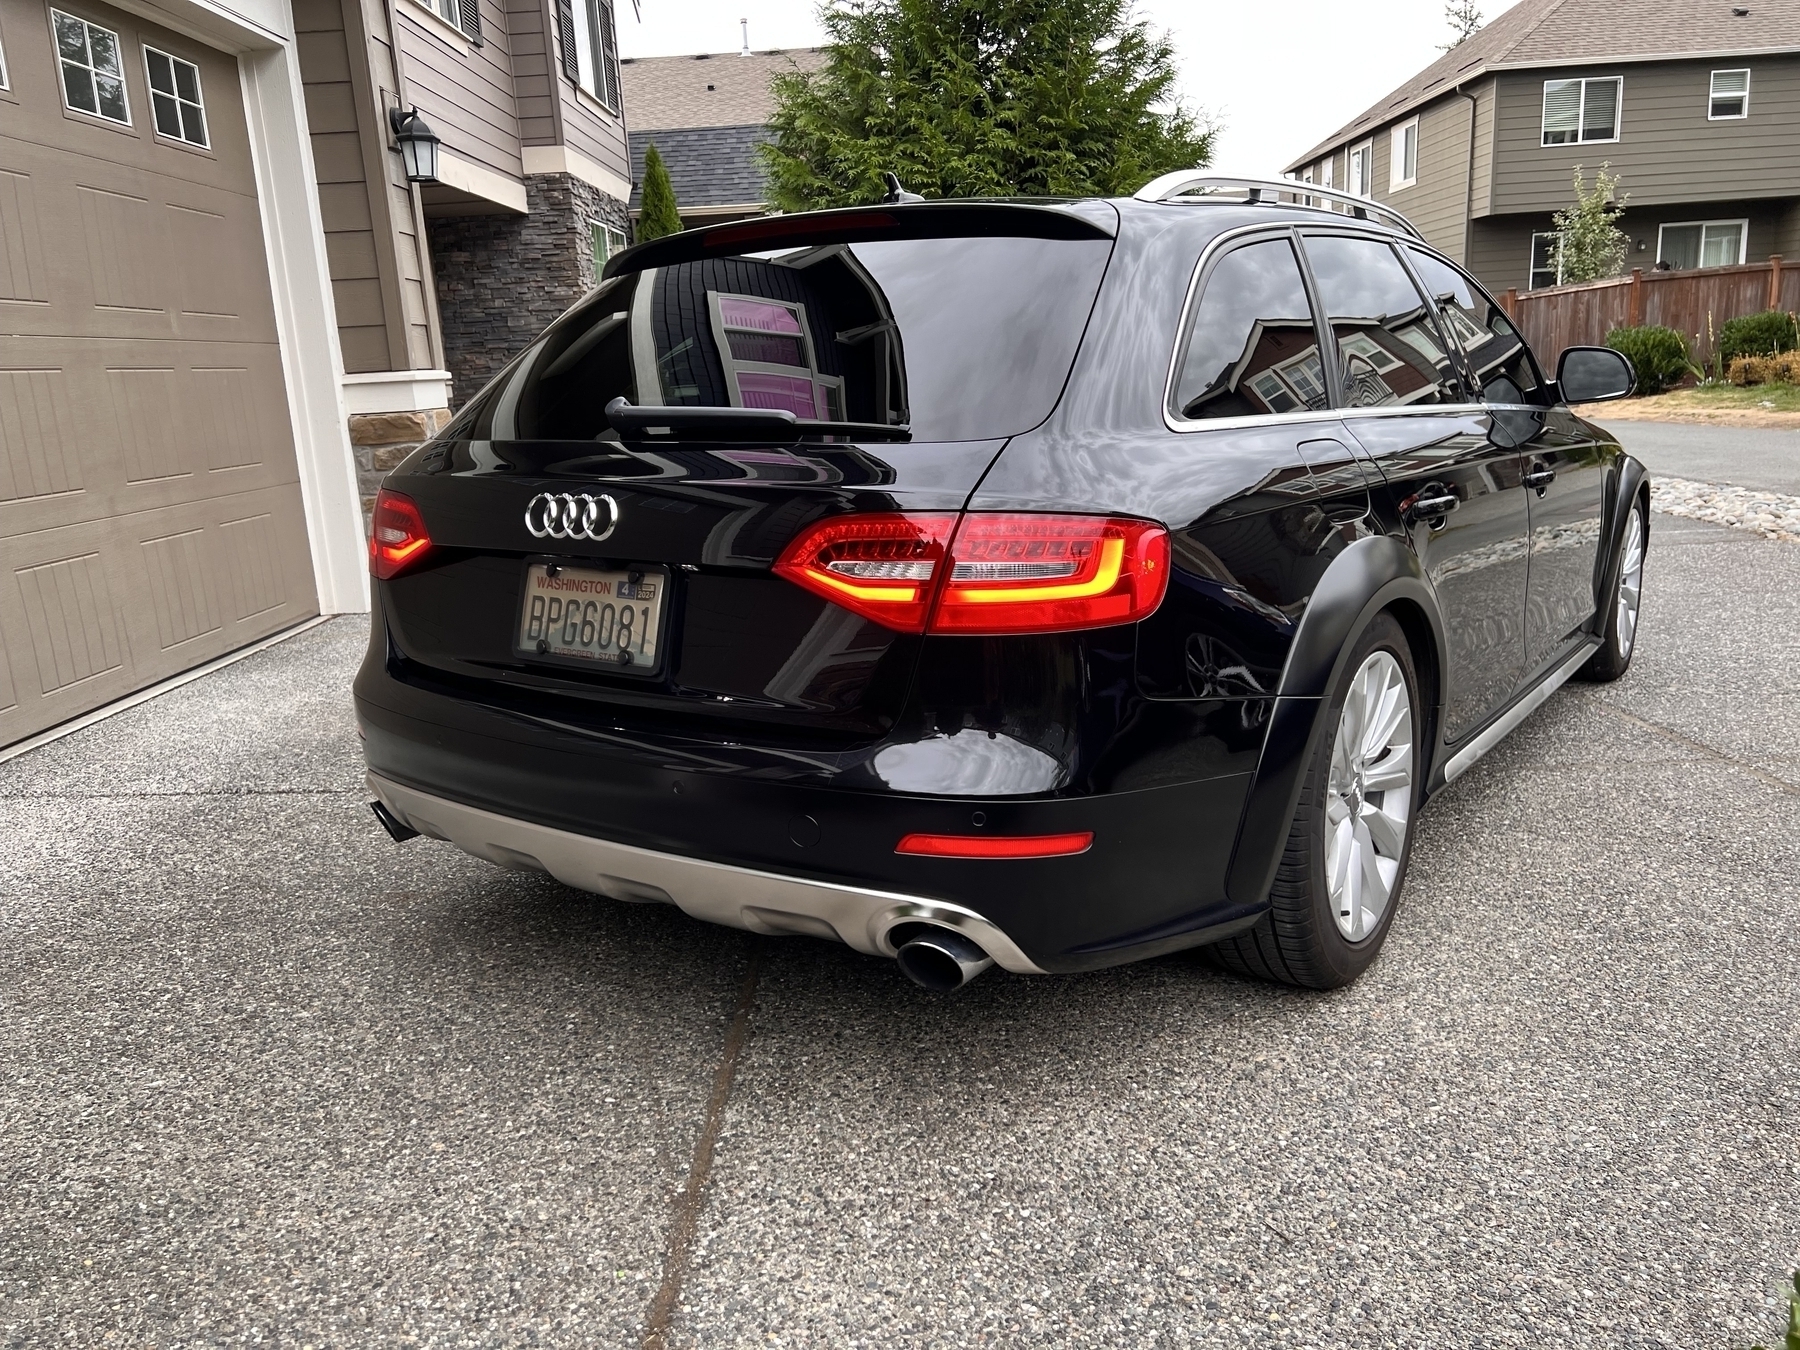
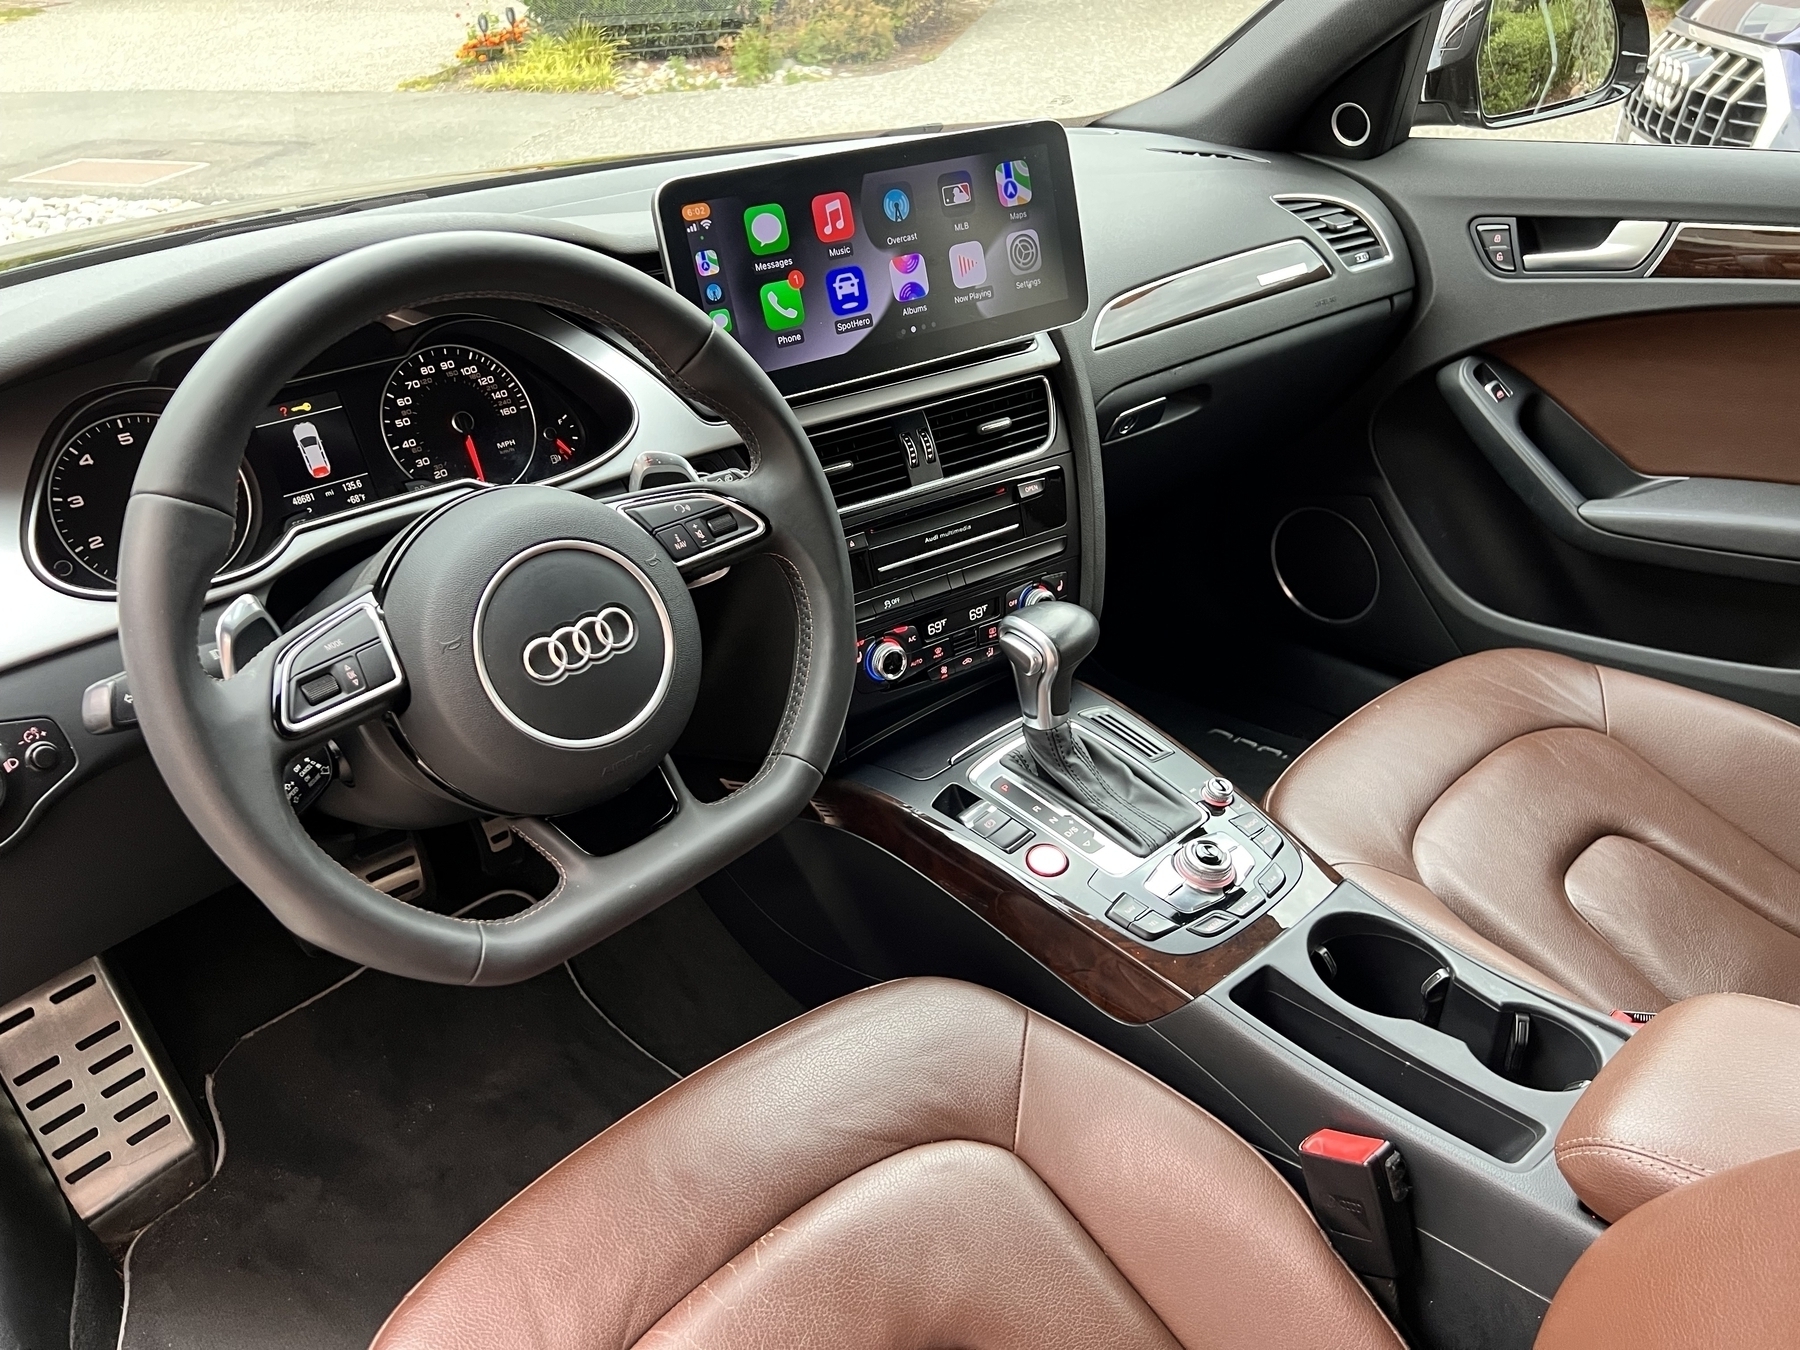
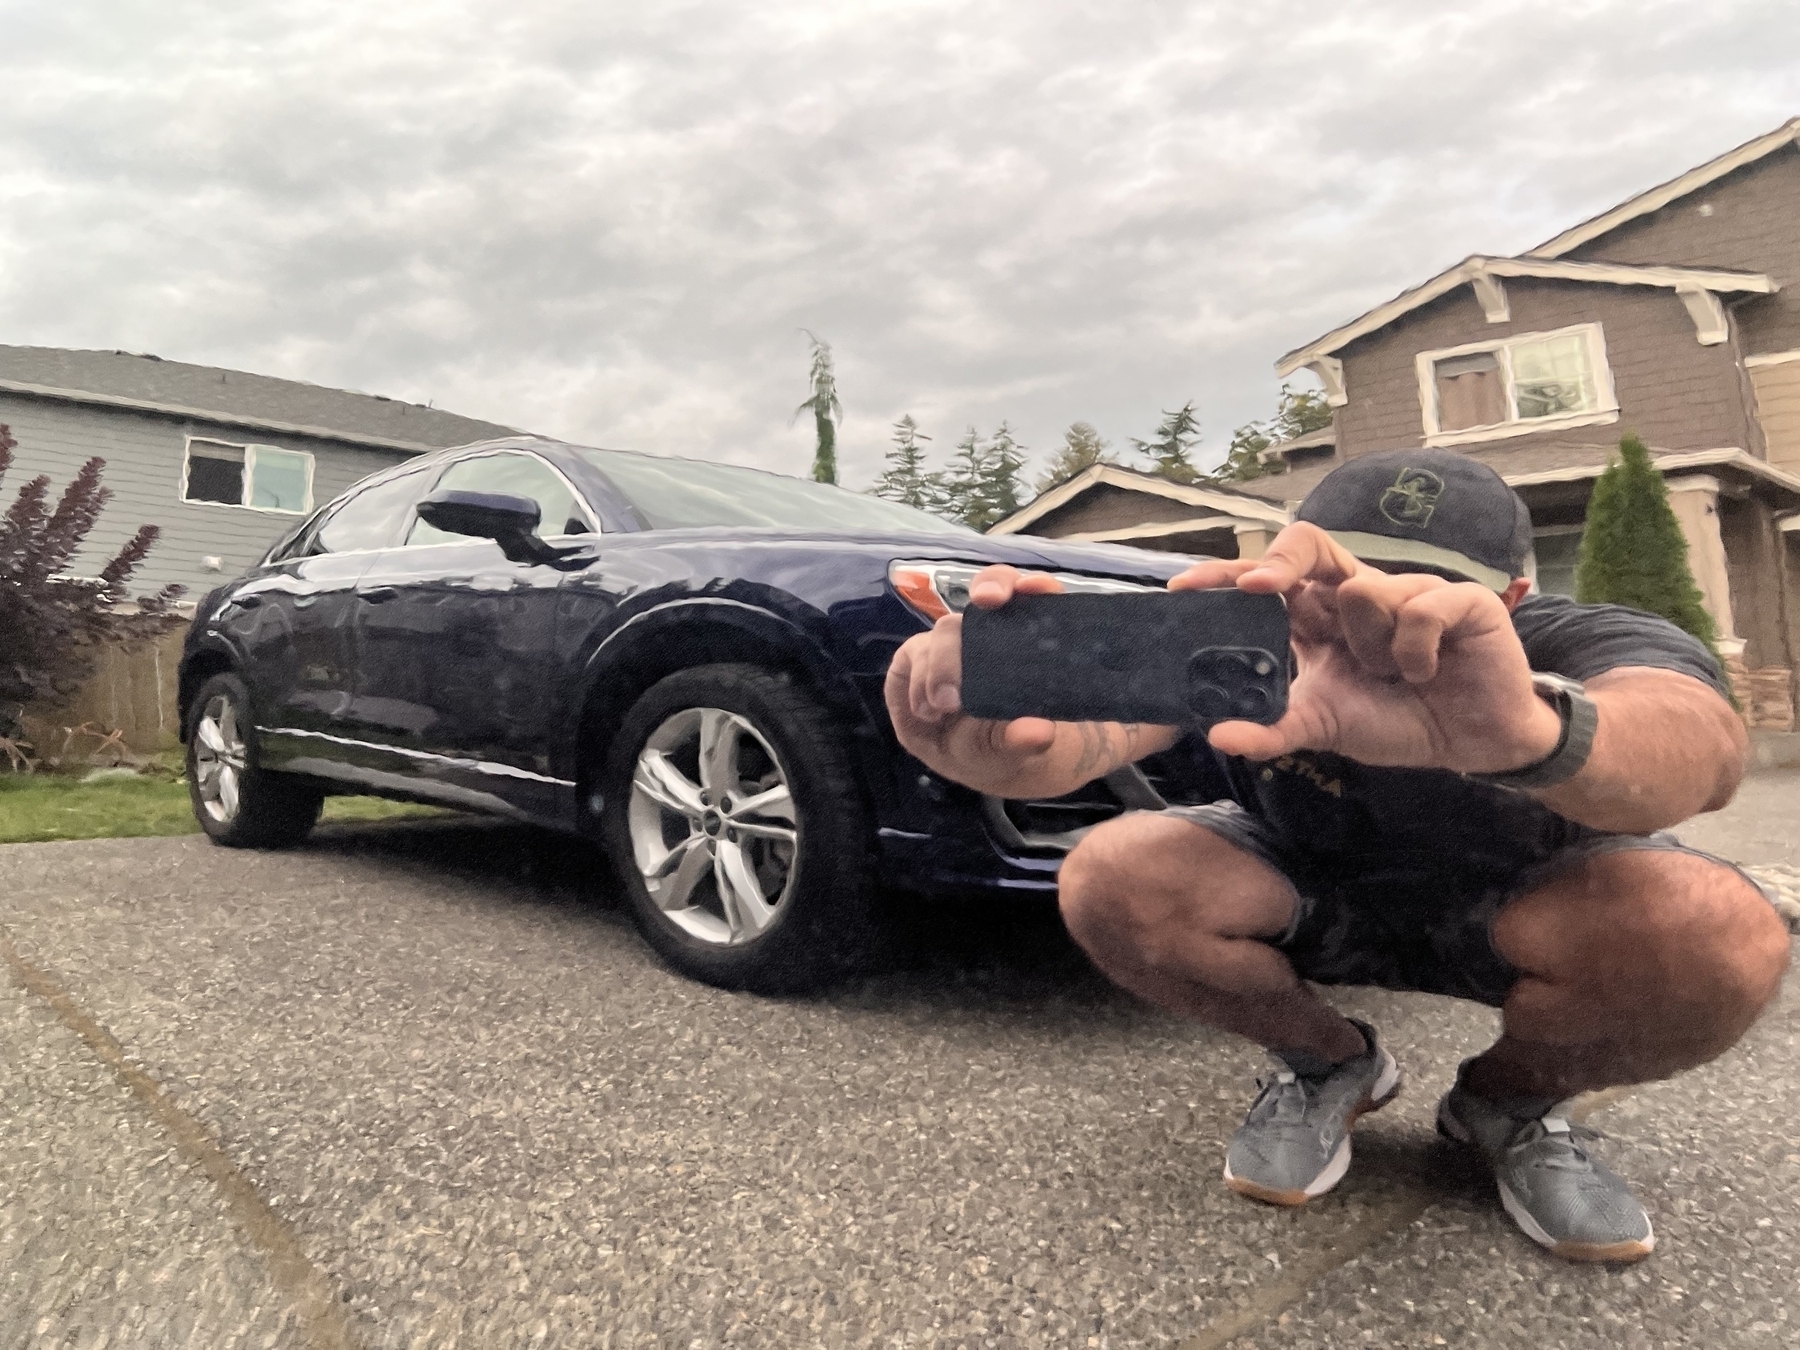
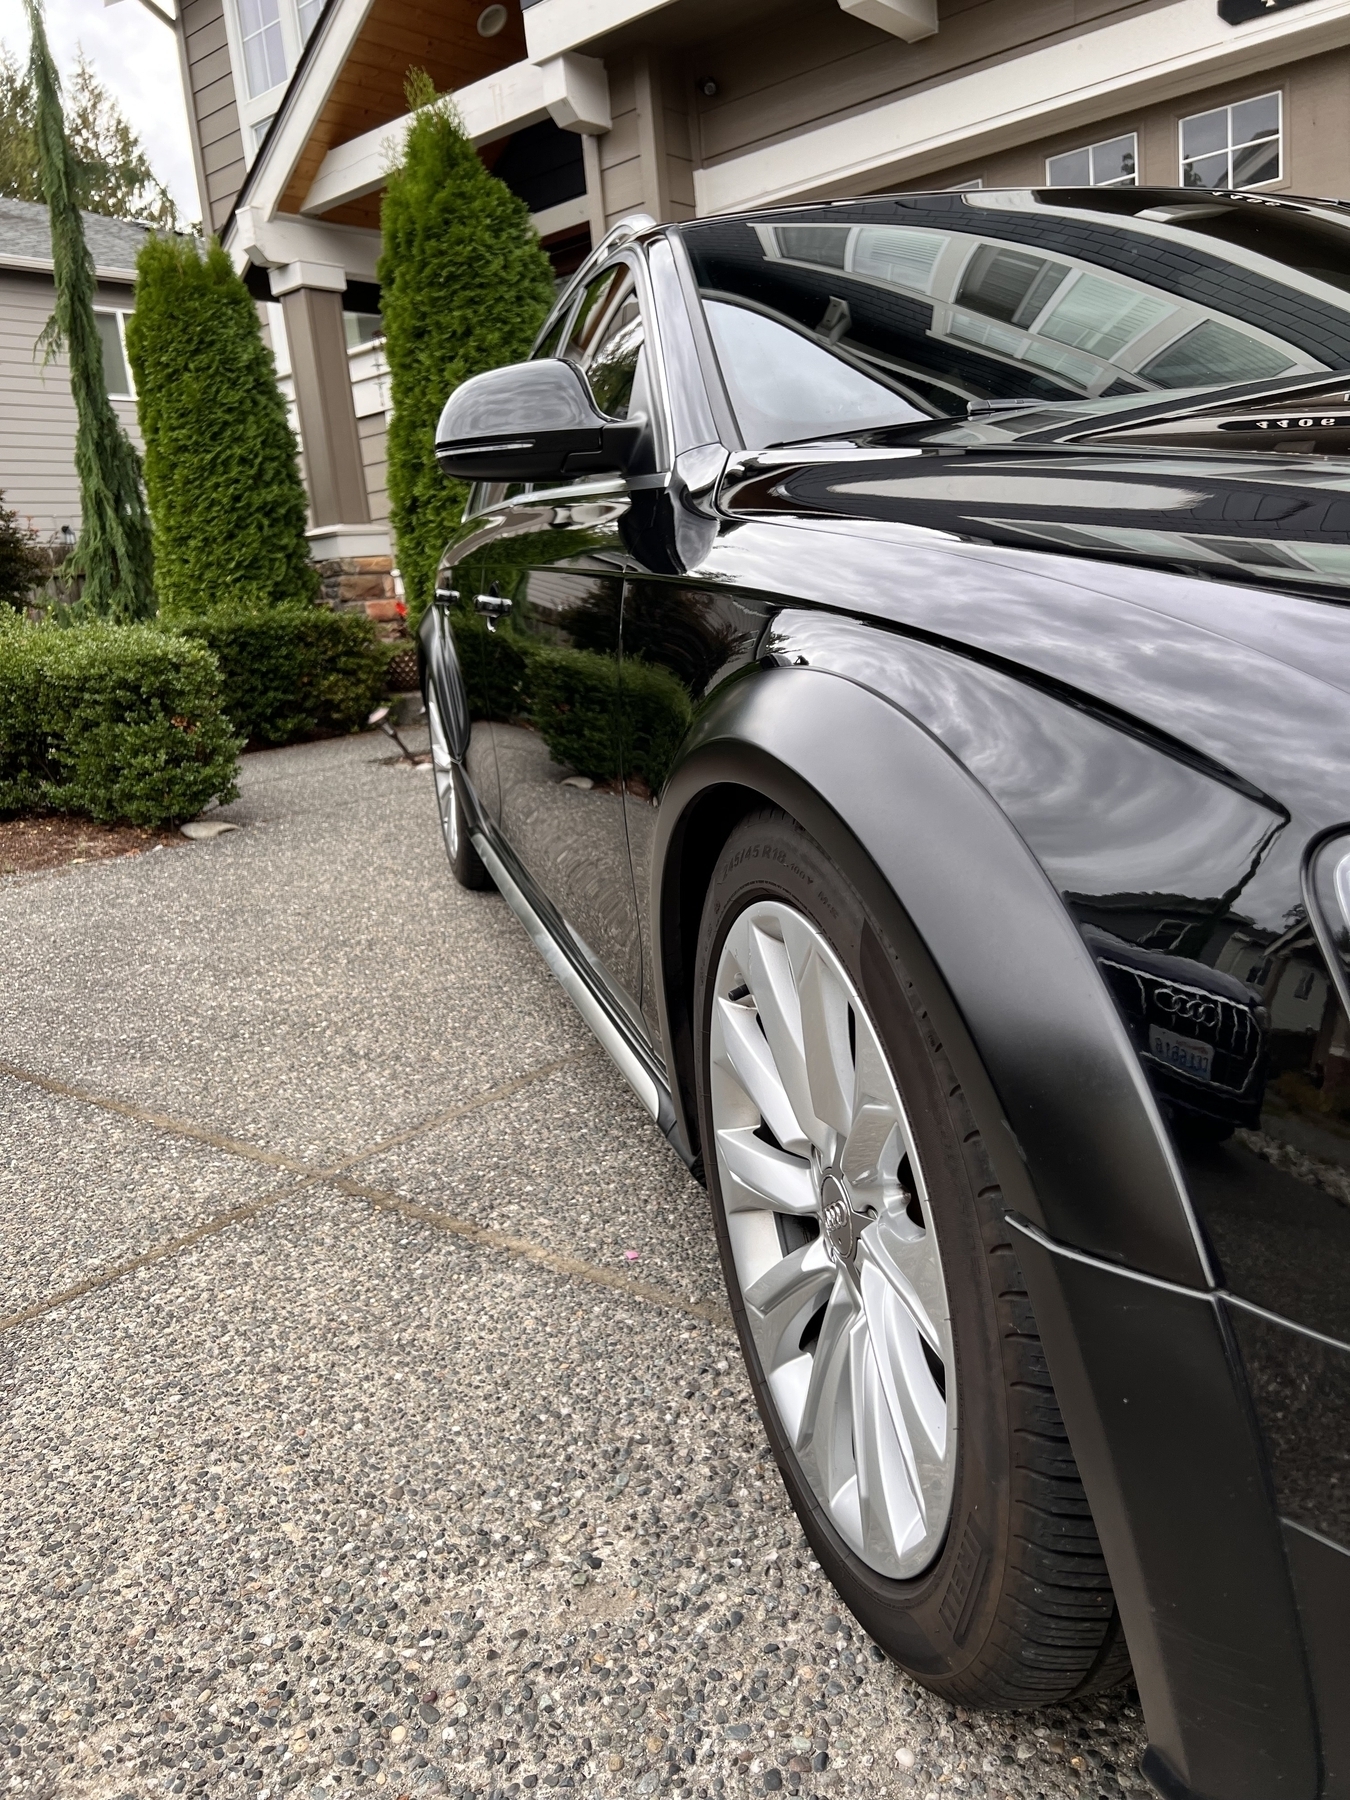
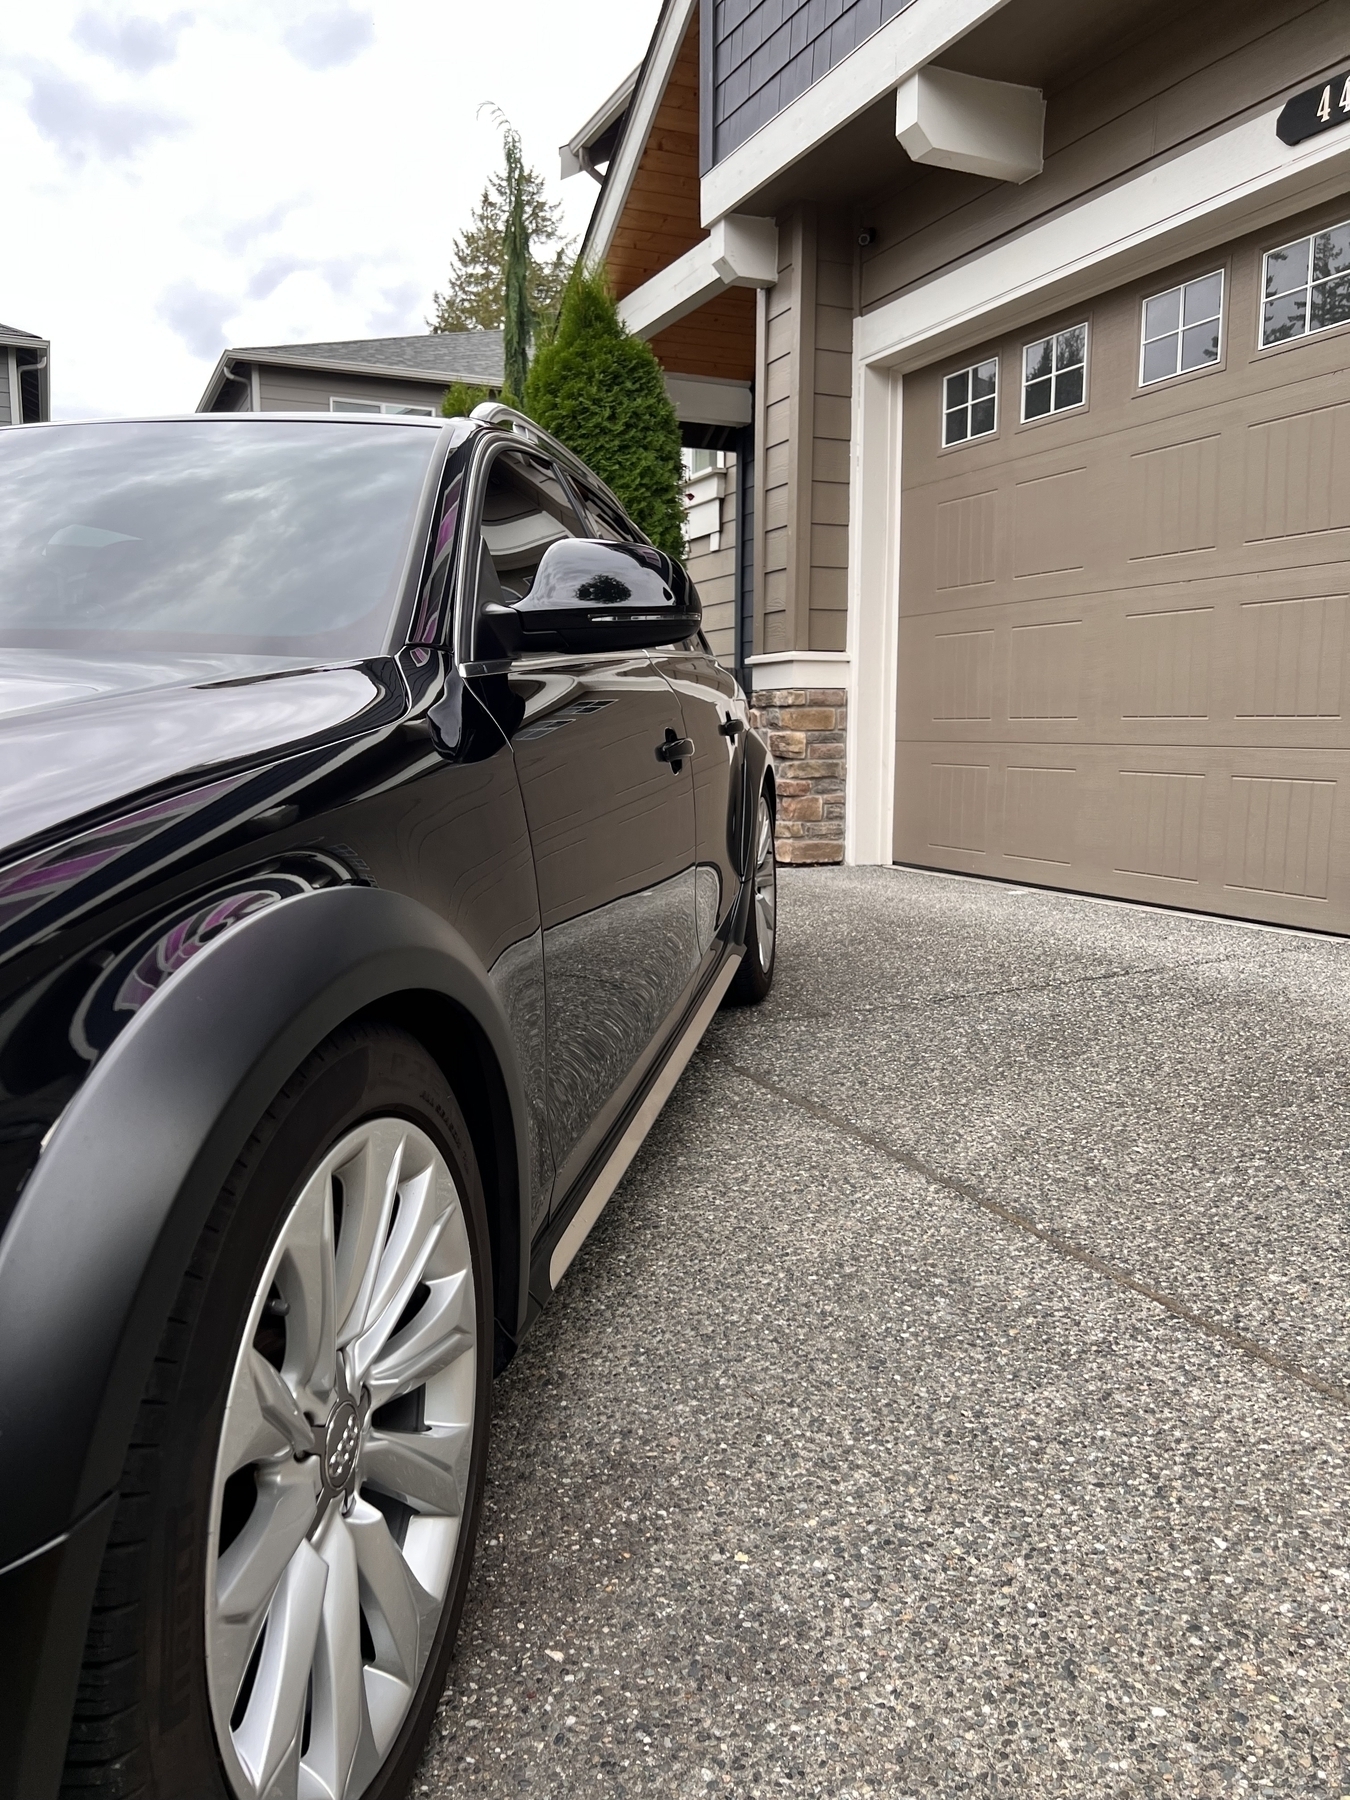
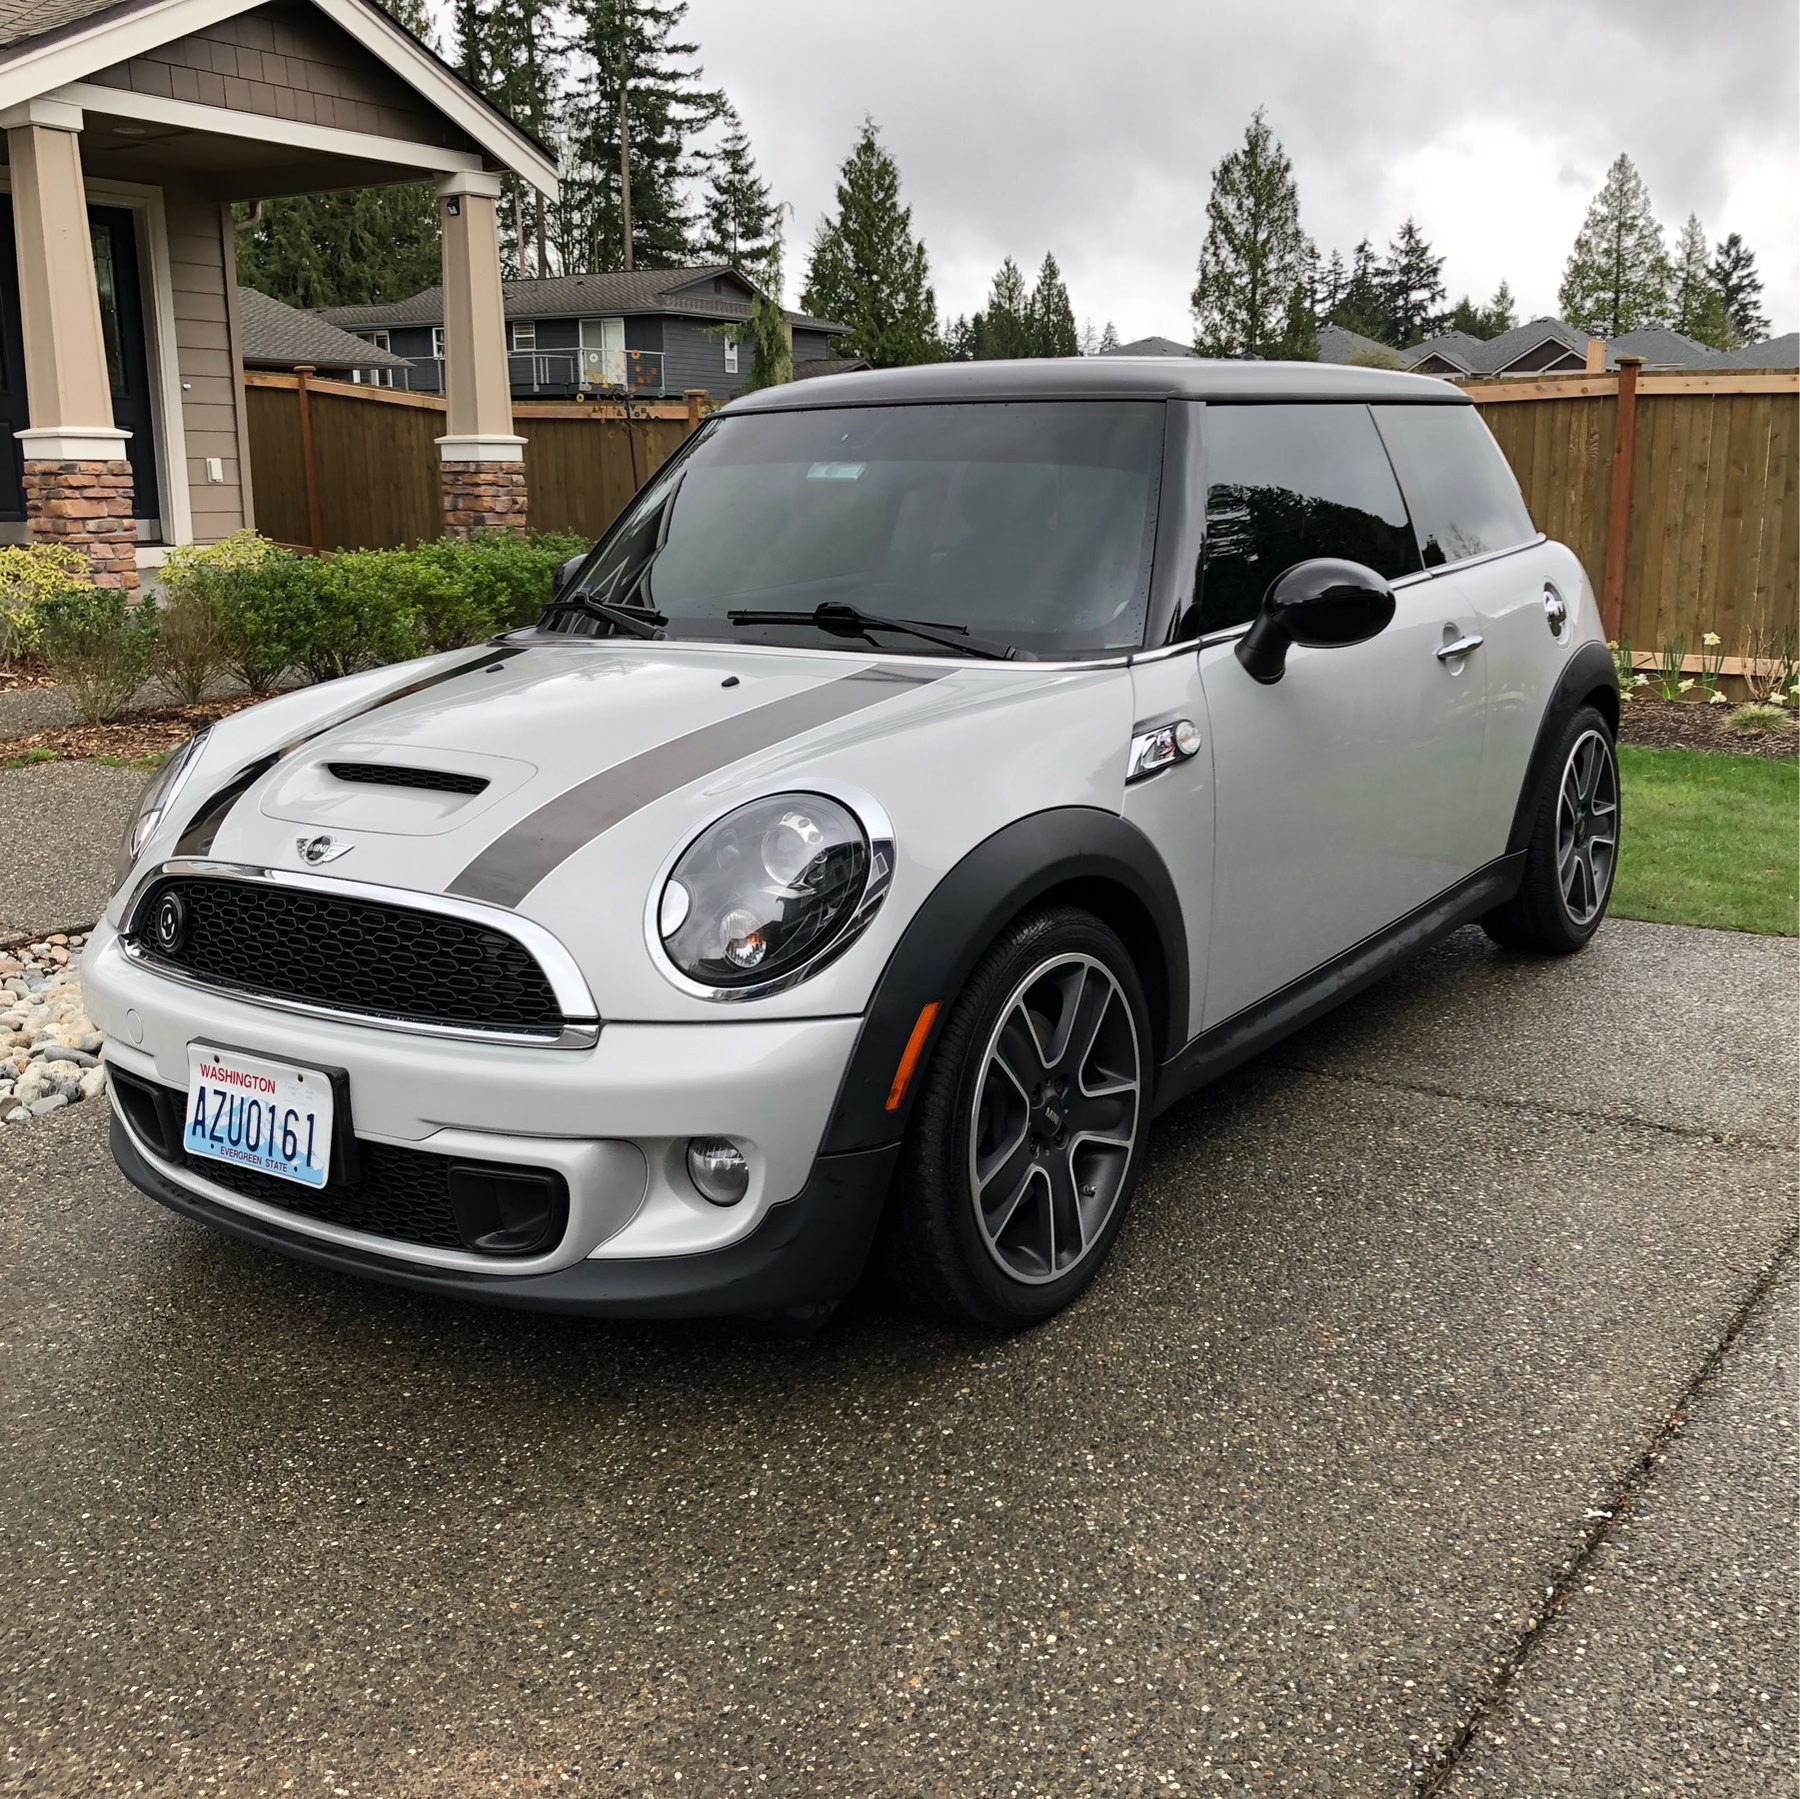
It’s time for me to part ways with my 2016 allroad 2.0t Premium Plus. Lightly, and if I may say, very tastefully modded 😎. Black on Chestnut leather. Currently sits at 48,681 miles, though I’ll be enjoying it until it sells.
I’m the second owner. The car doesn’t have an entirely clean title: I was rear ended by a kid in a Jeep in 2019 just a few weeks after I bought it, and in October of the same year the PPF and ceramic was thoroughly put to use when it was covered in outdoor paint. Long story, but if you’re interested, you can read about the whole thing in my car’s diary thread. It looks beautiful now, if I do say so myself. I had bodywork done by Paramount Center in Fife, an Audi certified shop.
Email me for more information or to come see it
Asking: $20,000
VIN: WA1UFAFL6GA003488
BadVIN Report - I prefer BadVIN to CarFax
Mods
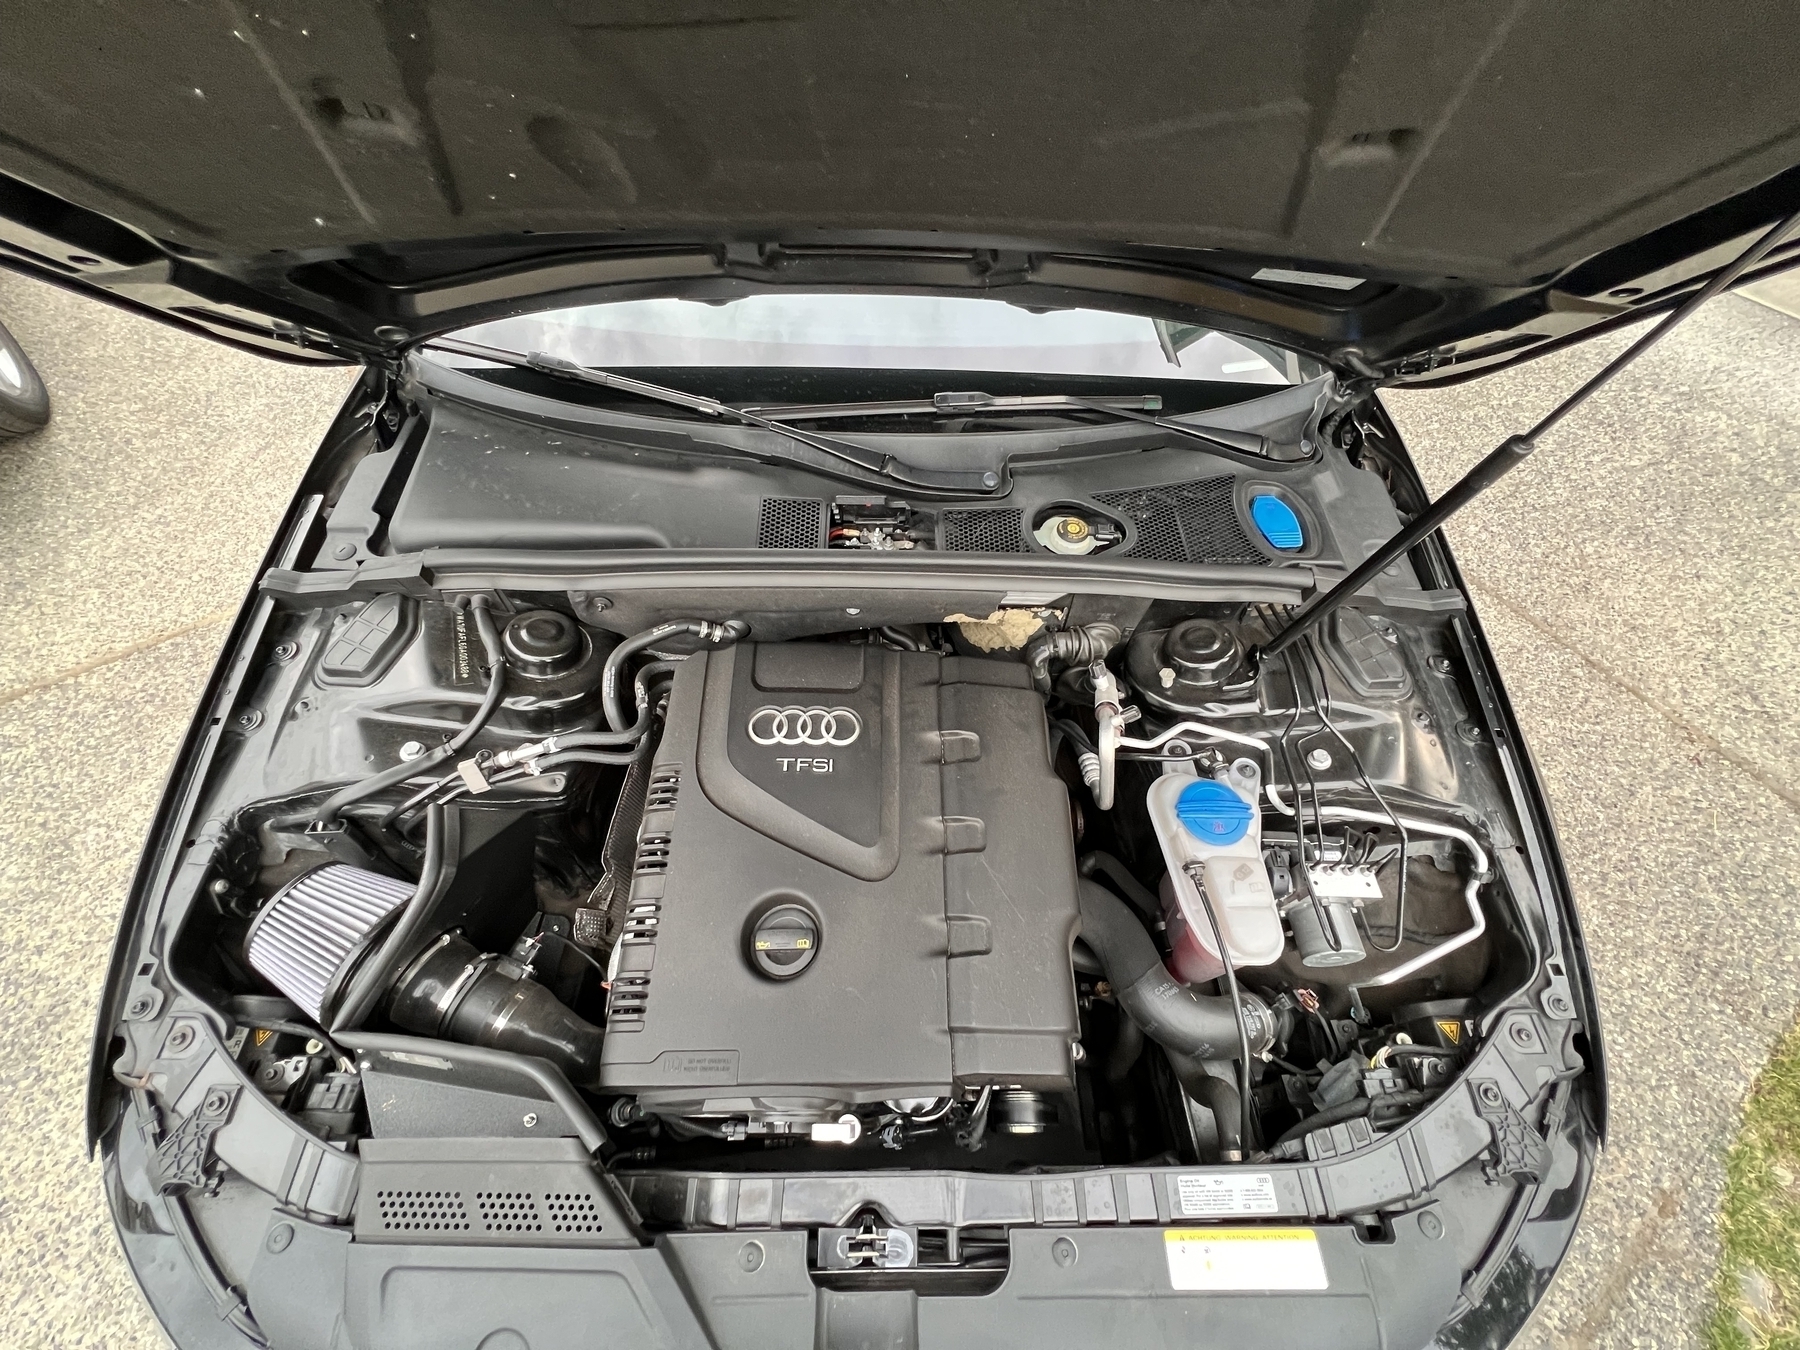
- IE CAI
- IE Stage 1 tune
- H&R Coilovers
- H&R Rear Swaybar
- Porsche Macan 4-pot front brake calipers
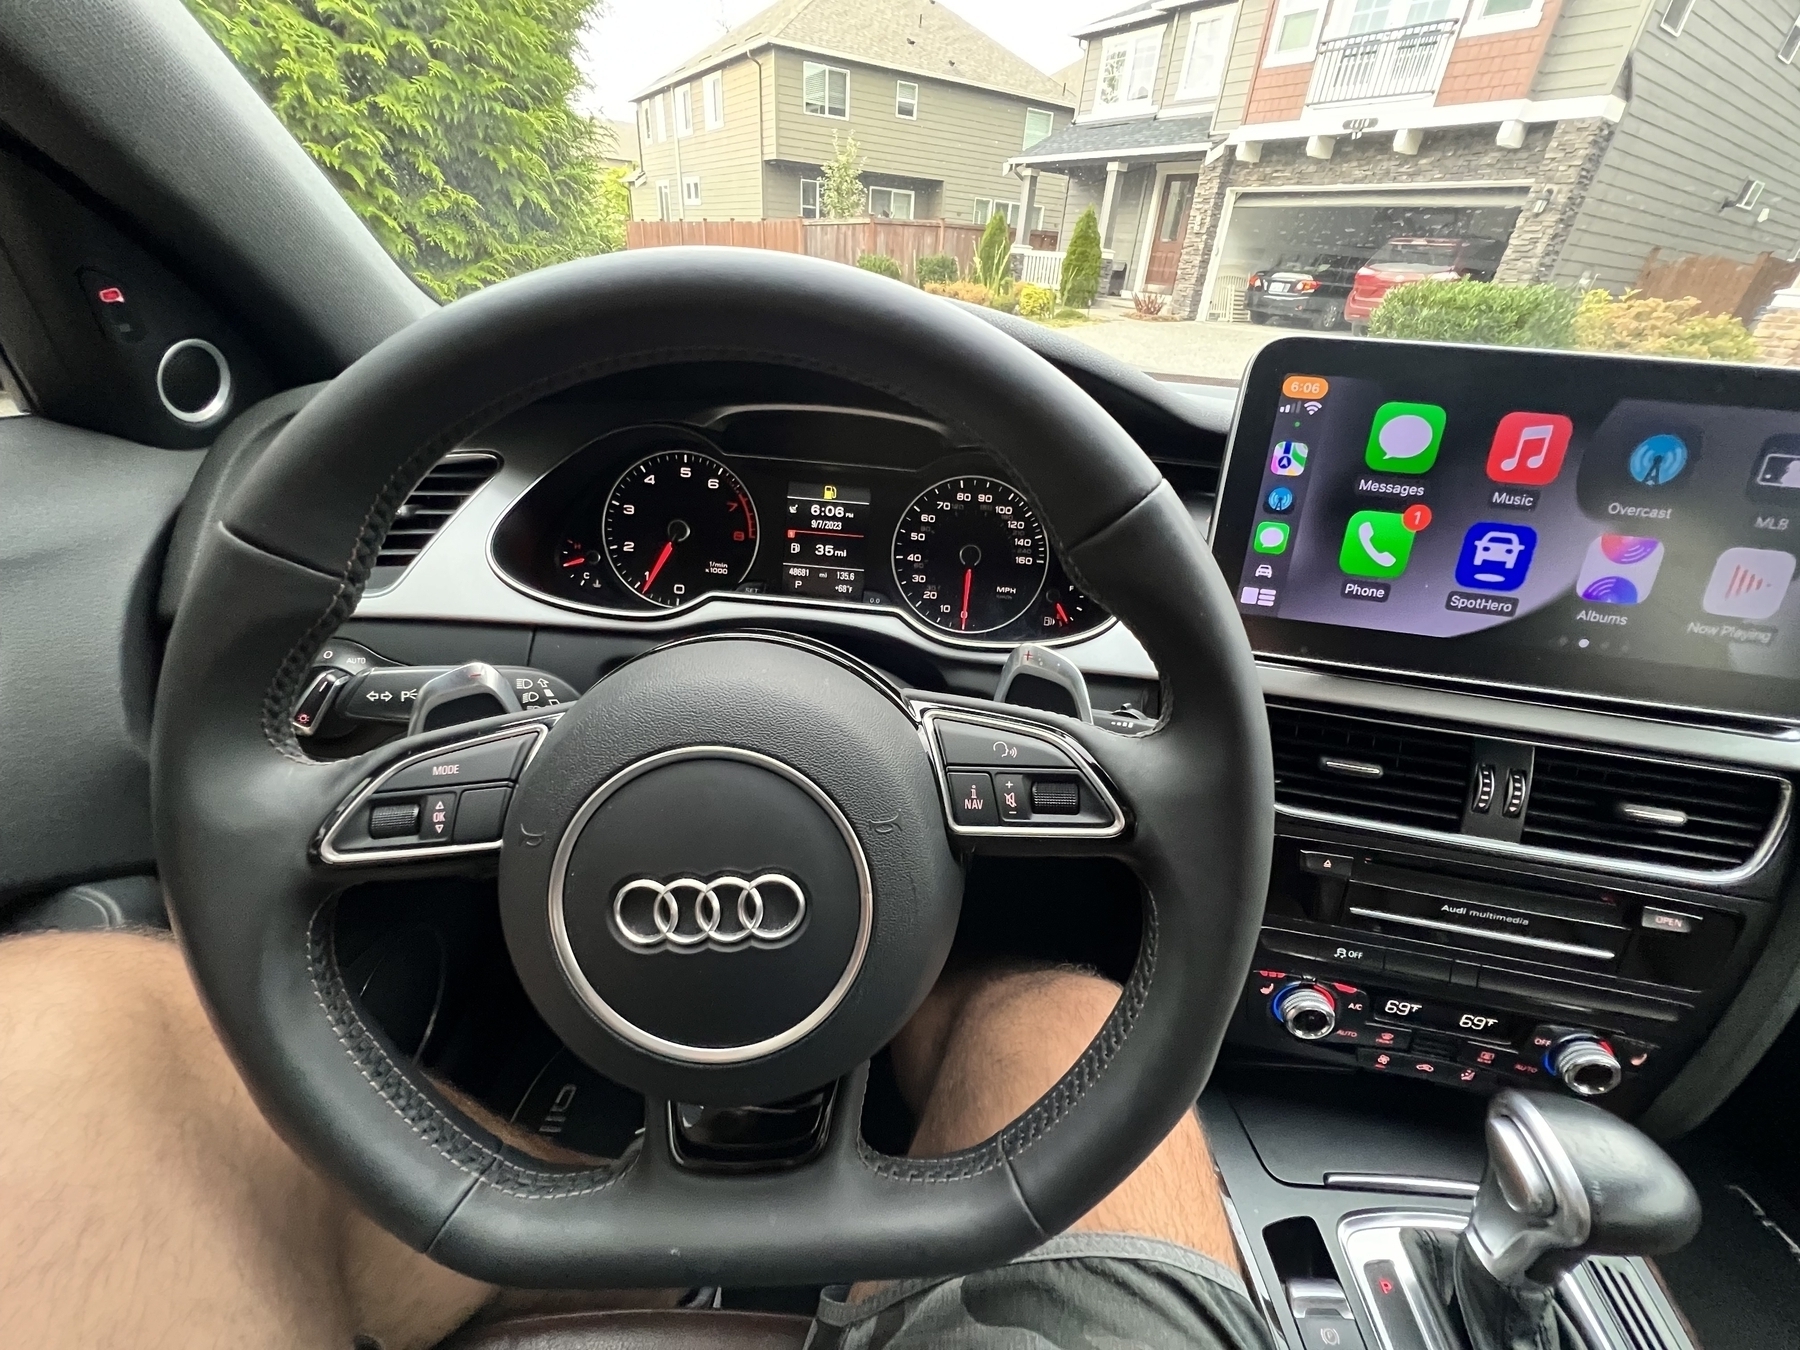
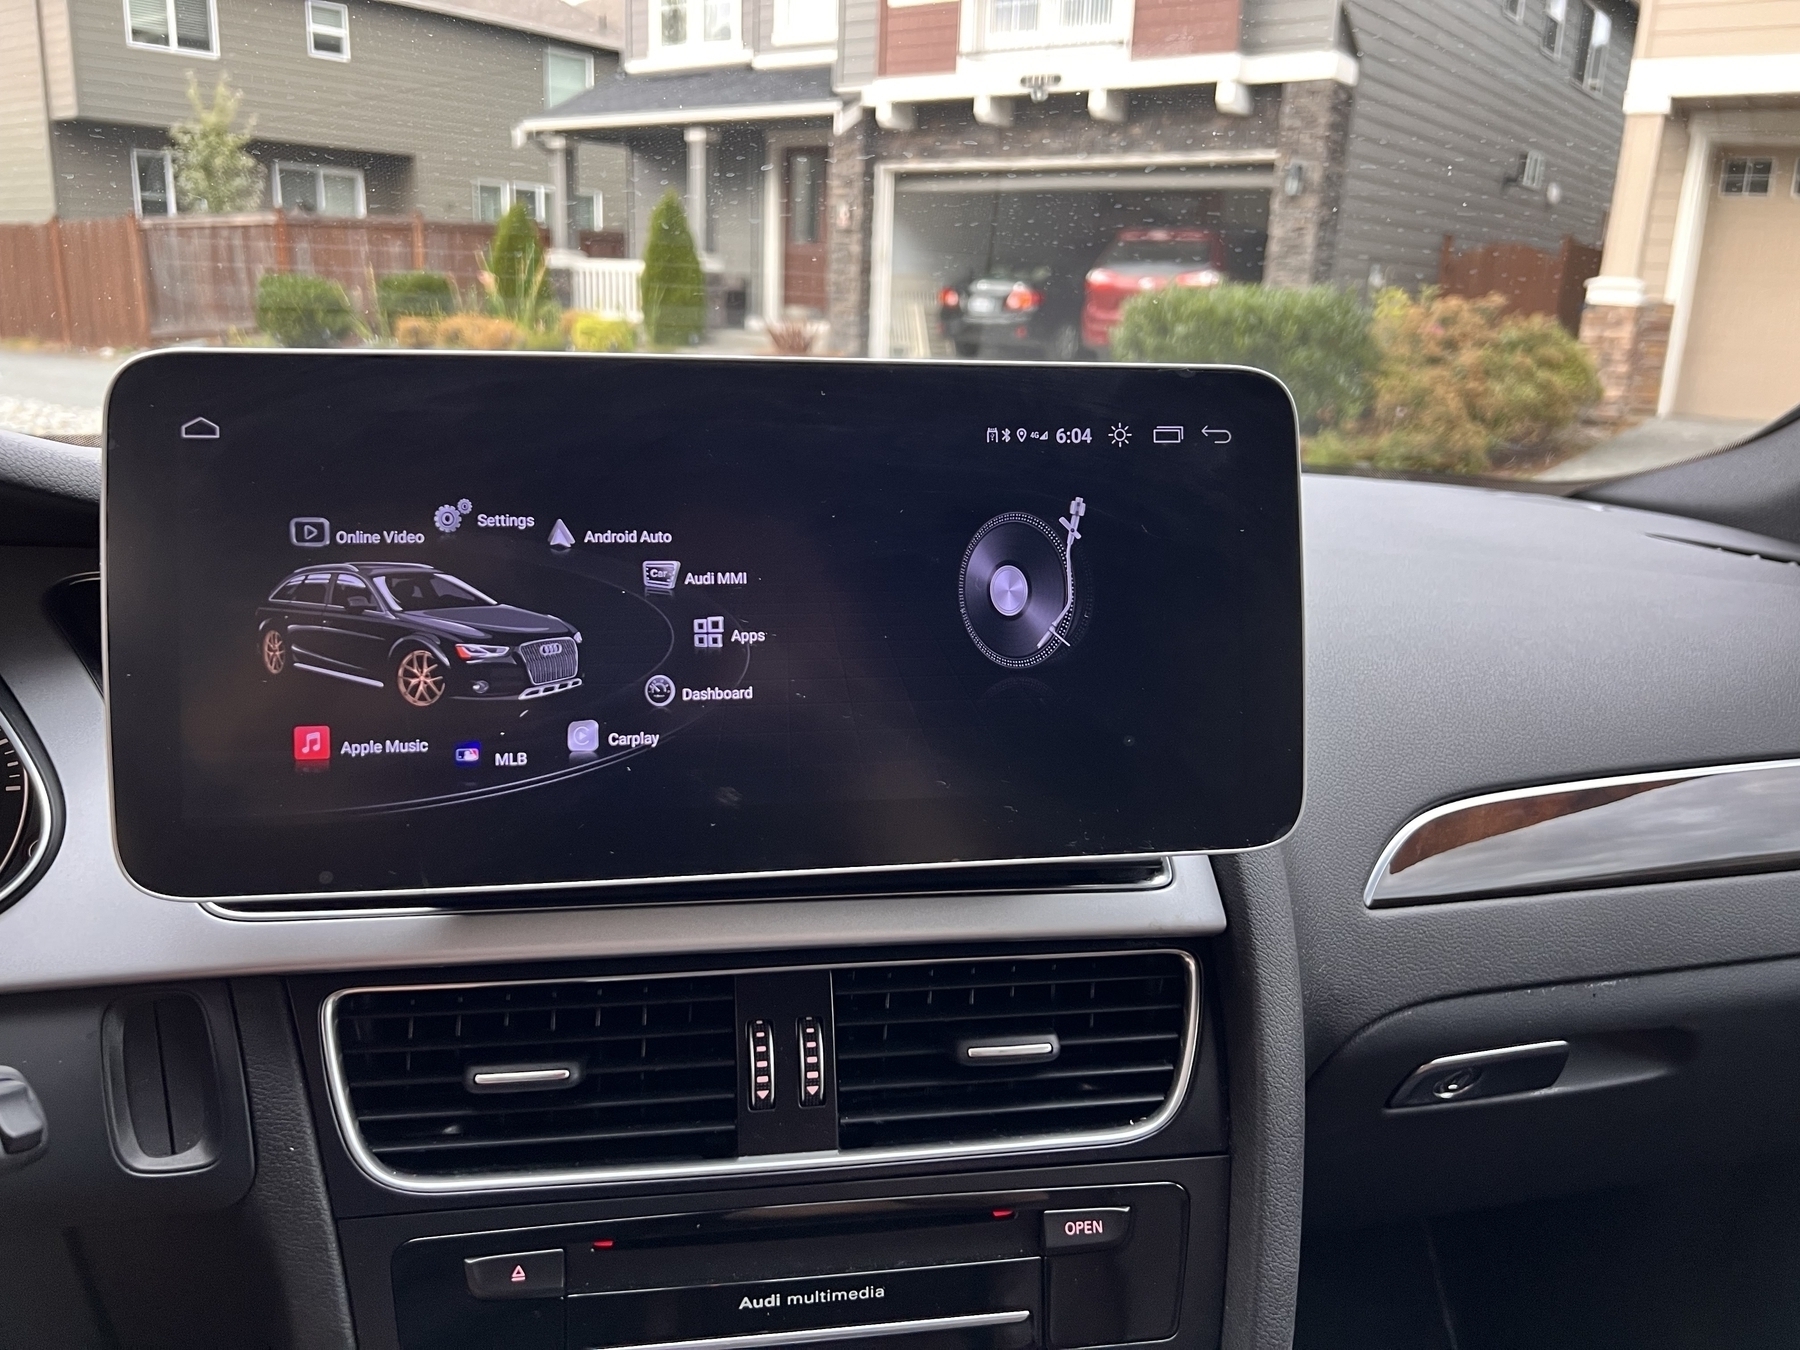
- RSNAV S4 Head Unit, integrated dashcam and HD backup cam
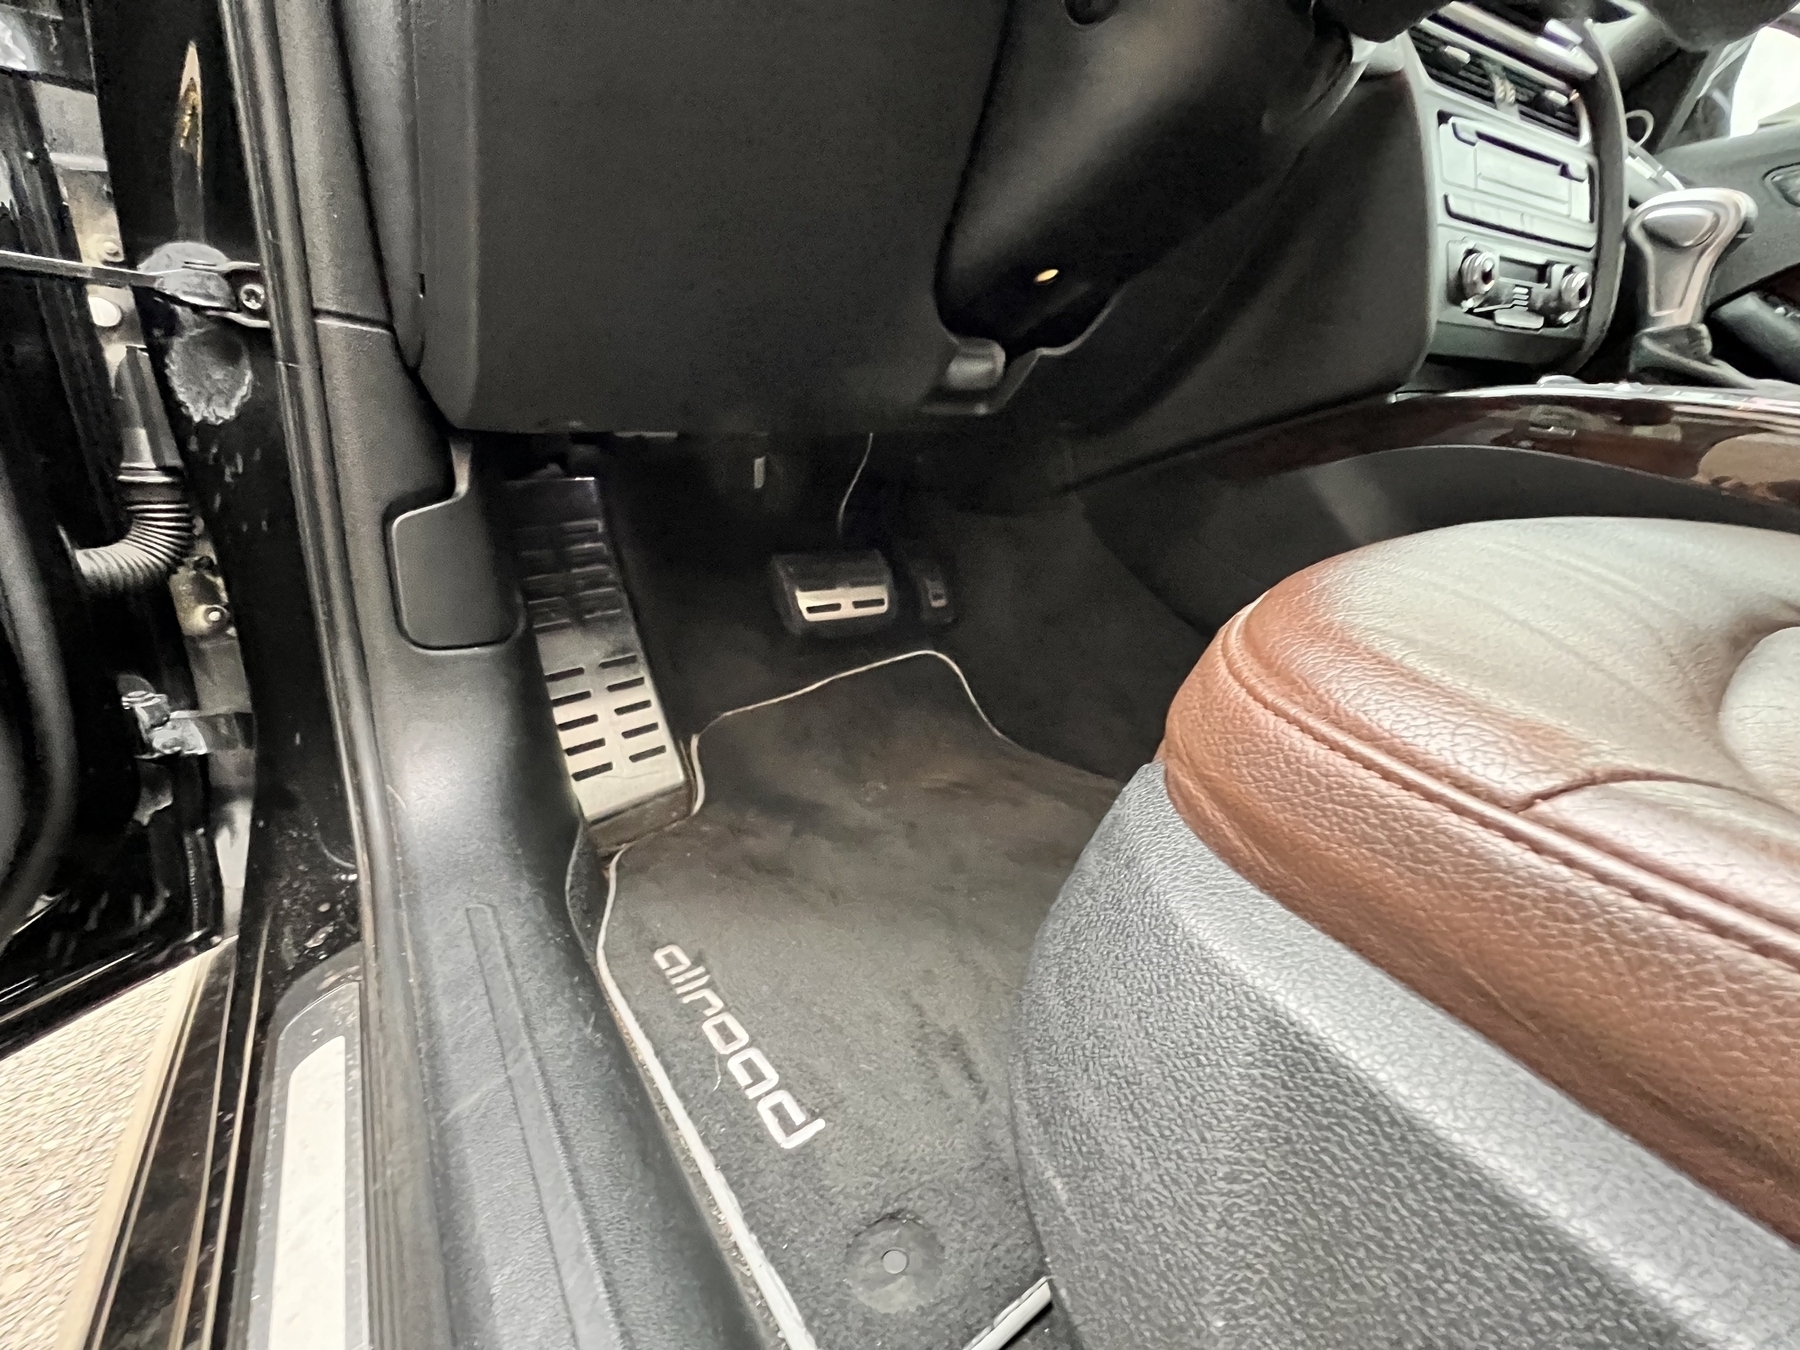
- Europrice FBSW w/ paddle shifters
- Xpel Fusion Paint Protection Film and Ceramic Coating
- Module to add hatch close by remote
Details
Macan/Q5/Sq5 Brembo 4-Pot Front Brakes and 345mm Front Rotors
- Brake Pads:
- Brembo: 8R0698151R + 1 Sensor
- Akebono: EUR1546
- Front Rotors: OE: 8K0615301M / ZIM-100333252
- Rear Rotors: OE: 8K0615601B / ZIM: ZIM-100333320
Maintenance Sticker OCR
WA1UFA FL 6 GA003488
8KH 52A 2811863=3
A4 Allroad   q.2.0  R4
162 KW  ABS. 	07/15
CPMB	KRR 	QCU
LY9T / LY9T   N1F/VR
EOA	7D5	4UB	6XL	5SG	5RW
1KW	J1N	1LA		1AT	1BP
3FU			5MG 7X7
FOA		9G3	0G7	0YM	0JJ
TL6	3NZ	8EH	U1B		GZ7
1XW		8Q3	9Q8	8Z6	D60
7T6	CH9	7K6	4X3	VJ1
3L4		VW1	3Y0	4I3	5D2
1SH		7GB	Q1A		4GQ
Decoded
Decoded with the [VW/Audi/Seat/Skoda Option Code Decoder][36]
E0A = No special edition
7D5 = DVD player
4UB = Air bag for NAR
6XL = Exterior mirrors: with memory function, automatically dimming, electrically foldable/adjustable/heated
5SG = Left exterior mirror: flat
5RW = Right exterior mirror: convex (US) large viewing field
1KN = Disc brakes, rear
J1N = Battery 420 A (75 Ah)
1LA = Disc brakes, front
1AT = Electronic stabilization program (ESP)
1BP = Suspension/shock absorption for special rough-road design
3FU = Big roof system
5MG = Decorative inserts, burr-walnut
7X7 = Park distance control rear with rear view camera
F0A = No special purpose vehicle, standard equipment
9G3 = Alternator 120-180 A
0G7 = Tiptronic
0YM = Weight range 12 installation control only, no requirement forecast
0JJ = Weight category front axle weight range 9
TL6 = 4-cylinder gasoline engine 2.0 l unit 06H.H
3NZ = Rear seat bench unsplit, backrest split folding
8EH = Bi-functional headlight with gas discharge lamp, for driving on the right(US design)
U1B = Instrument insert with mph speedometer, clock, tachometer and trip odometer
GZ7 = Power latching for sliding door right
1XW = Leather trimmed multi-function sports steering wheel
8Q3 = Automatic headlight-range adjustment dynamic (self-adjusting while driving)
9Q8 = Multi-function display/on-board computer
8Z6 = Hot country
D60 = 4-cyl. SI engine 2.0 l/162 kW 16V turbo FSI, homogeneous base engine is T61,TW6,TP6,T1P
7T6 = Navigation system (MID)
CH9 = Alloy wheels 8J x 18
7K6 = Flat tire indicator
4X3 = Side air bag front with curtain air bag
VJ1 = Reinforced bumpers
3L4 = Electric seat adjustment for both front seats, drivers seat with memory system
VW1 = Side windows tinted green, from B-pillarto rear window gray tinted safety glass
3Y0 = Without roll-up sun screen
4I3 = Central locking system "Keyless Entry" without deadlock
5D2 = Carrier frequency 315 MHz
1SH = Additional engine and transmission guard
7GB = Emission standard ULEV 2
Q1A = Standard front seats
4GQ = Windshield in heat-insulating glass)

